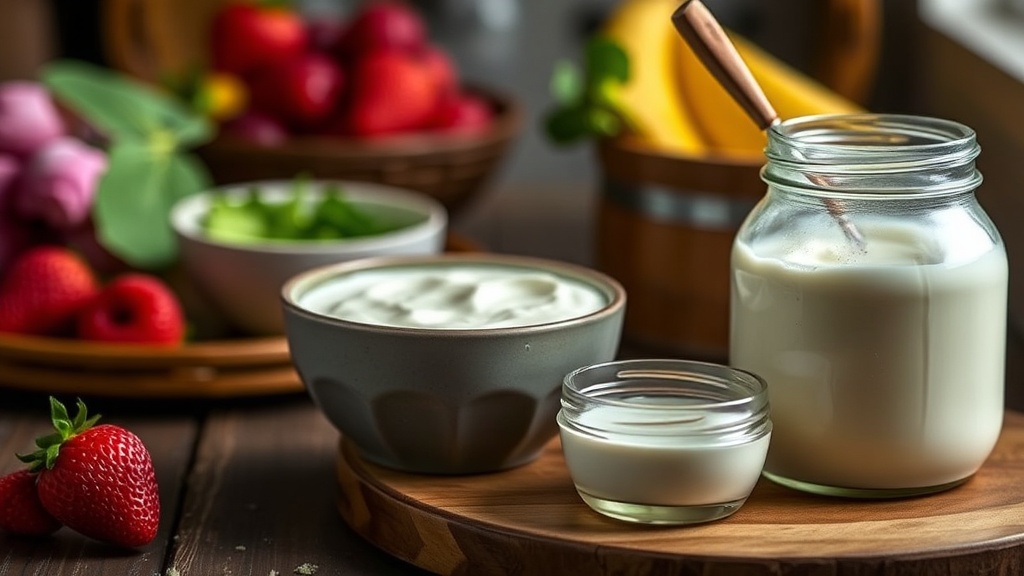
8 Cheap Ways to Make Your Own Yogurt at Home

The Classic Stove-Top Method
Using a Slow Cooker for Easy Batches
The Instant Pot Yogurt Trick
Making Greek-Style Yogurt with a Strainer
Using an Oven for Gentle Heat
The No-Equipment Jar Method
Making Coconut Milk Yogurt for Dairy-Free Options
Using a Thermos to Maintain Temperature
A standard 32-ounce tub of high-quality Greek yogurt can easily cost $5.00 or more at stores like Whole Foods or even your local Kroger. If your family goes through two or three tubs a week, that is a significant chunk of your weekly grocery budget. Making your own yogurt at home allows you to control the sugar content, ensure there are no thickeners like cornstarch or carrageenan, and, most importantly, drastically lower your cost per ounce. This guide covers eight practical methods to produce delicious, creamy yogurt using basic kitchen tools and affordable ingredients.
1. Use a Slow Cooker for Large Batches
If you need to make a large quantity of yogurt for a big family or for weekly meal prepping, a slow cooker is one of the most efficient tools in your kitchen. This method is perfect for making a full gallon of yogurt at once. You will need a large crockpot, milk (whole milk works best for texture), and a starter culture.
To start, pour your milk into the slow cooker and heat it on the "low" setting until it reaches 180°F. Use a digital thermometer to ensure you hit this temperature; this kills any unwanted bacteria. Once it hits 180°F, remove the lid and let the milk cool to about 110°F. This is the most critical step—if the milk is too hot, you will kill your starter culture. Stir in about two tablespoons of plain yogurt with "live active cultures" per quart of milk. Replace the lid and let it sit on the "warm" setting for 8 to 10 hours. The steady, low heat of the slow cooker provides the consistent environment needed for fermentation.
2. Utilize an Instant Pot for Speed and Consistency
The Instant Pot has become a staple in many budget-conscious kitchens because of its "Yogurt" function. This setting is designed to maintain a precise temperature, which removes the guesswork of traditional stovetop methods. Using an electric pressure cooker ensures that you won't accidentally scorch the milk, which can happen easily on a gas stove.
For this method, you can use the "Warm" setting to heat your milk and water bath if you are using a double-boiler technique, or simply use the dedicated Yogurt button. The beauty of the Instant Pot is that it creates a controlled environment that is less prone to temperature fluctuations than a standard oven. This is especially helpful if you live in a colder climate where your kitchen temperature varies throughout the day. Once the cycle is complete, you can strain the yogurt through cheesecloth if you prefer a thicker, Greek-style consistency. This is a great way to create a base for creamy salad dressings or fruit parfaits later in the week.
3. The Oven Method with a Water Bath
If you don't own a specialized yogurt maker or an Instant Pot, your standard kitchen oven can do the job. This method uses a "bain-marie" or water bath technique to ensure the heat remains gentle and even. This is ideal for making smaller batches, such as two or three quart-sized jars at a time.
First, heat your milk and starter in a heavy-bottomed pot on the stove until it reaches 180°F. After cooling to 110°F and mixing in your culture, pour the mixture into heat-safe glass jars, such as Mason jars. Place these jars inside a deep baking pan. Fill the pan with hot water (about 110°F) until it reaches halfway up the sides of the jars. Place the pan in an oven that has been preheated to the lowest possible setting—usually around 170°F—or simply turn the oven off after preheating and slide the pan inside. The residual heat will keep the temperature stable for 8 to 12 hours. This method is very reliable for producing a consistent texture without expensive equipment.
4. Use a Sous Vide Machine for Precision
For those who already own a sous vide immersion circulator, this is perhaps the most foolproof way to make yogurt. The biggest challenge in homemade yogurt is maintaining a steady temperature between 105°F and 115°F. A sous vide machine is designed specifically for this level of precision, virtually eliminating the risk of a "failed" batch due to overheating.
Fill a large container or a sink with water and set your sous vide to 110°F. Place your milk and starter in a heat-safe glass jar or a heavy-duty Ziploc bag. Submerge the container in the water bath. Because the water temperature is regulated by the circulator, you can leave the yogurt to ferment for the duration of the cycle without checking it every hour. This method is excellent for making "overnight" yogurt, as the temperature will not drift even over a long period.
5. Make Soy or Nut-Based Yogurt for Dietary Needs
If your family avoids dairy due to allergies or lifestyle choices, making your own soy or coconut yogurt is significantly cheaper than buying specialty brands like Silk or So Delicious. Commercial plant-based yogurts often carry a high premium because they are treated as "specialty" items. Making them at home allows you to use basic pantry staples.
For soy yogurt, you will need to make soy milk first. You can do this by blending dried soybeans with water and straining them through a nut milk bag. Once you have your soy milk, heat it to 180°F and cool to 110°F, then add a vegan starter or a bit of plain soy yogurt with live cultures. For coconut yogurt, use full-fat canned coconut milk. The high fat content in the canned milk is essential for a creamy texture. Be sure to use a high-quality coconut milk that contains only coconut and water, avoiding brands with added thickeners or gums to keep it truly "real food."
6. The Thermos Method for Small Batches
If you only need a small amount of yogurt—perhaps just enough for a single breakfast or to test a new recipe—a high-quality insulated thermos is your best friend. This is a low-tech, highly effective way to ferment yogurt without any electricity or heat sources once the initial heating is done.
Heat your milk and starter in a saucepan on the stove until it reaches 180°F. Once it cools to 110°F, pour the mixture into a pre-warmed thermos. The insulation of the thermos will trap the heat generated by the bacteria as they begin to ferment, creating a self-sustaining environment. This is a great way to utilize leftover warmth in the kitchen. Because the temperature might drop more quickly in a thermos than in an oven, keep an eye on the consistency after about 6 to 8 hours. This method is particularly useful for travelers or people living in small spaces like dorm rooms or studio apartments.
7. Use a Yogurt Maker for Set-and-Forget Convenience
If you find yourself making yogurt every single week, investing in a dedicated yogurt maker is a smart long-term budget move. These small countertop appliances are specifically designed to maintain the exact temperature required for fermentation. They are often much cheaper than an Instant Pot or a high-end slow cooker.
The process is straightforward: heat your milk on the stove, cool it, add your starter, and pour it into the yogurt maker's container. Once you turn it on, the machine handles the rest. Most models have a timer or a preset cycle. This method is the most "hands-off" approach and is perfect for busy parents who need to get things done in the morning before the kids' school runs. It ensures that the temperature remains stable, which leads to a more consistent thickness and less "whey" separation at the top.
8. Ferment with Kefir Grains for Probiotic Variety
If you want to expand your nutritional profile, you can use kefir grains instead of standard yogurt starter. While yogurt is made by adding specific bacteria to milk, kefir is made using "grains"—a symbiotic culture of bacteria and yeast. This results in a drinkable, slightly more acidic yogurt that is incredibly high in probiotics.
To do this, place your kefir grains into a jar of room-temperature milk (cow, goat, or even certain plant milks). Unlike traditional yogurt, you do not need to heat the milk to 180°F. Instead, you let the grains sit at room temperature for 24 hours. The grains will "consume" the lactose in the milk, turning it into a tangy, fermented liquid. Once it reaches your desired thickness, strain the grains out using a fine-mesh sieve and store the yogurt in the refrigerator. You can reuse these grains indefinitely, making this an incredibly low-cost way to produce high-quality probiotics for your family.
Tips for Success and Cost Savings
To get the most out of your homemade yogurt, keep these three practical tips in mind:
- Save Your Starter: Never throw away the last two tablespoons of your homemade yogurt. This is your "seed" for the next batch. This eliminates the need to constantly buy new yogurt to use as a starter.
- Buy Milk in Bulk: Since milk is your primary ingredient, look for the largest, most economical containers at stores like Costco or Sam's Club. Even if you have to buy a gallon at a time, the price per quart is significantly lower than buying small containers of flavored yogurt.
- Control the Sweeteners: Commercial yogurts are often loaded with sugar. To save money and stay healthy, make your yogurt plain and add your own sweetness. You can use frozen berries (which are cheaper than fresh out of season) or a drizzle of honey.
Making your own yogurt is a foundational skill for anyone looking to master a budget-friendly kitchen. Whether you use a slow cooker, an Instant Pot, or a simple thermos, you are taking control of your food quality and your grocery budget at the same time.