Stop Buying Expensive Bread and Make Your Own

A standard loaf of organic, sprouted grain bread can easily cost $6.00 or more at a grocery store like Whole Foods or even your local Kroger. When you multiply that by three kids who go through a loaf every four days, your bread budget alone is eating a massive hole in your weekly grocery allowance. This guide explains how to stop overpaying for bread by making your own basic loaves, rolls, and flatbreads using pantry staples like flour, yeast, and salt. Making your own bread isn't just about saving money; it’s about controlling the ingredients to ensure your family isn't consuming high-fructose corn syrup or excessive preservatives.
The Real Cost of Store-Bought Bread
If you look at the ingredient label on a standard loaf of white bread, you will often see more than just flour and water. Many commercial brands include dough conditioners, calcium propionate (a preservative), and refined sugars to extend shelf life. While these additives make the bread stay "fresh" on a shelf for weeks, they add to the retail price. By switching to homemade dough, you are essentially paying for the raw weight of the ingredients rather than the branding and processing. A 5-pound bag of all-purpose flour from a store like Walmart or Aldi costs a fraction of what a single loaf of specialty bread costs, meaning one bag can produce roughly 10 to 12 loaves of bread.
Essential Tools for the Budget Baker
You do not need a professional bakery setup to make successful bread. Most of the tools required are likely already in your kitchen cabinets. To get started, you only need a few basic items:
- A Large Mixing Bowl: Glass or stainless steel works best for observing dough growth.
- A Digital Kitchen Scale: While measuring cups work, weighing ingredients in grams provides much more consistent results, especially with flour.
- A Wooden Spoon or Dough Hook: For initial mixing.
- A Baking Sheet or Loaf Pan: A standard 9x5 inch loaf pan is ideal for sandwich bread.
- A Bench Scraper: This is a cheap tool (often under $5) that helps you clean your counter and divide dough without the mess.
The Three Basic Types of Bread to Start With
I recommend starting with three specific types of bread because they use similar ingredients but serve different meal-planning purposes. Mastering these will cover your breakfast toast, your lunch sandwiches, and your dinner sides.
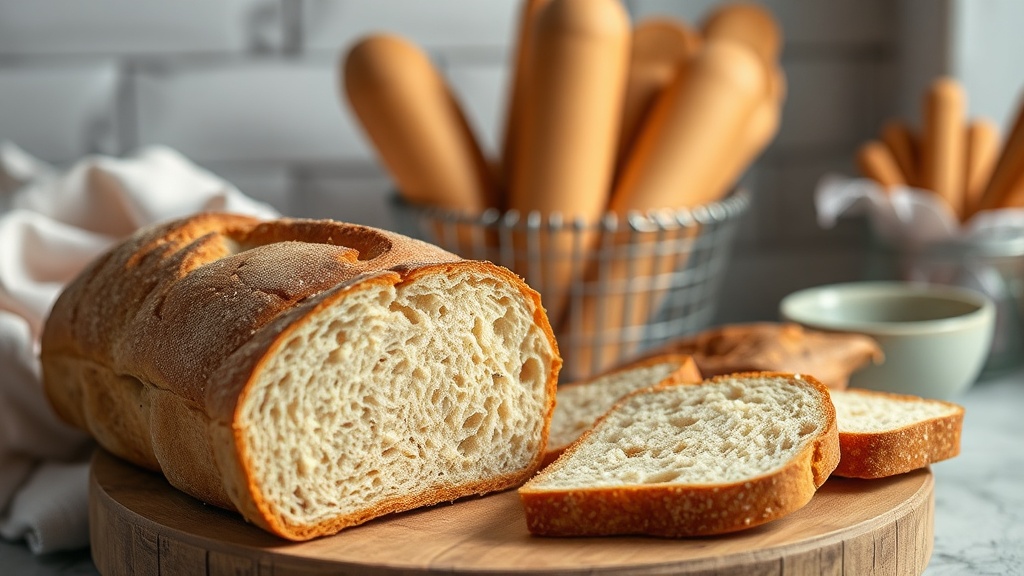
1. Basic White Sandwich Bread
This is the bread your kids will use for peanut butter and jelly or grilled cheese. It is soft, easy to slice, and uses standard active dry yeast. The key to a soft crumb is not over-kneading and ensuring your liquid is warm—around 105°F to 110°F—but not hot, as hot water will kill the yeast.
2. No-Knead Crusty Loaf
If you want something that feels more "artisanal," the no-knead method is a lifesaver for busy moms. This requires very little physical labor; you simply mix the flour, water, salt, and yeast into a shaggy dough, let it sit for 12 to 18 hours, and bake it. It produces a thick, crunchy crust that is perfect for dipping into soups or making garlic bread.
3. Quick Flatbreads
Flatbreads are perfect for when you realize you forgot to start a dough earlier in the day. These are often made with yogurt or even just flour and water, cooked in a dry skillet on the stove. They are excellent for wrapping around leftover meats or using as a base for homemade pizza.
A Reliable Beginner Recipe: The Everyday Sandwich Loaf
Use this recipe when you need a reliable loaf for the school lunchbox. This yields one standard loaf.
- Prepare the Yeast: In your mixing bowl, combine 1 cup of warm water (105°F) and 2.25 teaspoons of active dry yeast (one standard packet). Let it sit for 5 minutes until it becomes foamy.
- Mix Ingredients: Add 3 cups of all-purpose flour, 1.5 teaspoons of salt, and 1 tablespoon of vegetable oil or melted butter.
- Knead the Dough: Mix until a dough forms, then turn it out onto a floured surface. Knead for about 8 to 10 minutes. You are looking for the dough to become smooth and elastic. If it is too sticky, add flour one tablespoon at a time.
- First Rise: Place the dough in a lightly oiled bowl. Cover with a damp kitchen towel and let it rise in a warm, draft-free spot for about 1 hour, or until it has doubled in size.
- Shape and Second Rise: Gently punch the dough down to release air. Shape it into a log and place it into a greased 9x5 inch loaf pan. Cover and let it rise again for 30 to 45 minutes.
- Bake: Preheat your oven to 375°F. Bake for 30 to 35 minutes. The loaf is done when the top is golden brown and the bottom sounds hollow when tapped.
Tips for Stretching Your Grocery Budget Further
Making bread is a great start, but you can maximize your savings by pairing your homemade goods with other low-cost pantry staples. For example, instead of buying expensive pre-made spreads, you can learn how to make your own nut butters at home to use on your fresh slices. Additionally, if you find yourself with leftover bread that is starting to get stale, do not throw it away. Turn it into French toast, homemade croutons for salads, or bread pudding to ensure zero waste.
Troubleshooting Common Bread Mistakes
If your bread isn't turning out quite right, it is usually due to one of four common issues. Don't get discouraged; even experienced bakers have "fails."
- The Bread is Too Dense: This usually means your yeast was either expired or the water you used was too hot. Always check the expiration date on your yeast packets. If the water is over 120°F, it will kill the living organisms before they can lift the dough.
- The Crust is Too Hard: If you are making sandwich bread, you might be baking it too long or at too high a temperature. Try lowering the oven by 25 degrees and checking the internal temperature with a thermometer; you are looking for roughly 190°F.
- The Dough Won't Rise: Ensure your kitchen isn't too cold. If you live in a cooler climate, try putting your dough inside an unlit oven with the oven light turned on. The heat from the light bulb is often enough to create a perfect proofing environment.
- The Bottom is Soggy: This happens if the loaf pan was too heavily greased or if the dough was too wet. Ensure you are measuring your flour by weight or using the "spoon and level" method rather than scooping the measuring cup directly into the flour bag, which packs the flour down and leads to incorrect ratios.
Storing Your Homemade Bread
Because homemade bread lacks the chemical preservatives found in store-bought loaves, it will not stay soft on the counter for as long. To prevent waste, follow these storage rules:
Countertop Storage: Keep your bread in a bread box or a sealed linen bag for up to 3 days. Avoid using plastic bags if you want a crusty loaf, as the moisture will make the crust soft and gummy.
Freezing: This is the secret to successful meal planning. Once your bread has cooled completely, slice it. Place the slices in a freezer-safe bag and freeze. You can take out exactly what you need for a single sandwich or a piece of toast without thawing the entire loaf. This method keeps the bread fresh for up to three months.
A Final Note on Ingredient Sourcing
To keep your costs at the absolute minimum, shop at bulk stores like Costco or Sam's Club for your flour and yeast. Buying a 25-pound bag of flour significantly reduces the price per ounce compared to the smaller bags found in the baking aisle of a standard grocery store. If you want to experiment with different grains, like whole wheat or rye, buy those in small quantities first to ensure your family enjoys the flavor before investing in a larger bag.